
We really couldn’t be happier with how our floor turned out, but we did make a few mistakes when sanding the floor. Because we see some floor sanding mistakes time and time again, we’re sharing our tips and tricks to not only make your life easier but also help you avoid the same floor sanding mistakes we’ve made. We made mistakes so you don’t have to!
Using the wrong sandpaper
By far the biggest mistake I see is not using the right sandpaper. I honestly can’t stress enough how important this is, and you’re not doing yourself a favor if you start sanding with too fine a paper.
What grain you start with will depend on what your floorboards are. If they have been sanded before and just need freshening up, you will be able to start sanding with a finer paper, but in most cases, you will need to start with a much coarser paper than you expect.
If your floors haven’t been sanded yet, the maximum grit you should start with is grit. I know that sounds super rough and radical, but anything finer won’t sand away enough dirt and old paint. But more importantly, you’ll be doing a lot more work, not to mention the cost, because you’ll end up using a lot more paper than if you were using the correct grit.
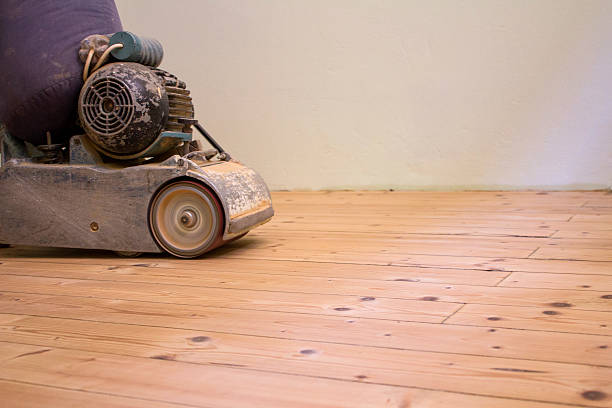
Our floors were slightly wavy and had a thick layer of varnish on them, so we started sanding with 16-grit paper! Using the wrong grit (too fine) will also mean that your sandpaper will clog up quickly. The jammed paper is useless, so it’s something you’ll want to avoid. Not only because it will end up costing you more because you’ll be replacing the paper all the time, but also because of the extra time it takes to replace it.
Insufficient grinding
There’s really no getting around it – sanding floors is demanding and physically tiring work. When you first start sanding, you’ll see a huge difference in your floor almost immediately, but once you’ve removed most of the paint and dirt, the process will seem much slower.
This is mostly due to the floorboards not being completely flat, which means the drum of the floor sander will not be able to reach all areas of the floorboards at once. This means that you will often be left with shadows either on the edges of the floorboards
While you probably think your floors look good enough to call it done, try to resist the temptation to stop. Sanding these last bits is the most frustrating part of the whole floor sanding process, as progress will seem almost zero.
You want to keep sanding until all the marks and the shadows are completely removed. You have to sand the floorboards until they look brand new even if you stain them (unless they are black or painted). This will make the difference between your finished floor looking amazing and professional or mediocre and amateurish.
Do not grind diagonally
We didn’t sand the floors diagonally the first few first sanding, but in our new home we did and it’s something we would recommend doing. It speeds up sanding the floors because it evens out your floorboards and doesn’t leave you with hard-to-reach spots on the floorboards (which is the shadow problem I mentioned above).
We never thought the sanded floors in our Edwardian home were uneven – and they really weren’t – but I was surprised by the difference to our newly sanded floors in our current home. It’s hard to describe and impossible to show in pictures, but somehow they feel much flatter and more even.